
Adding a screen to your porch is a game changer, especially when you want to enjoy the outdoors without the hassle of bugs or flying debris. If you’ve been wondering how to install screening on a porch, you’re in the right place. This guide will walk you through everything you need to know to complete the project successfully, whether you’re doing it yourself or hiring help. From choosing materials to installing the final panel, we’ve got you covered.
Why Screen In Your Porch?
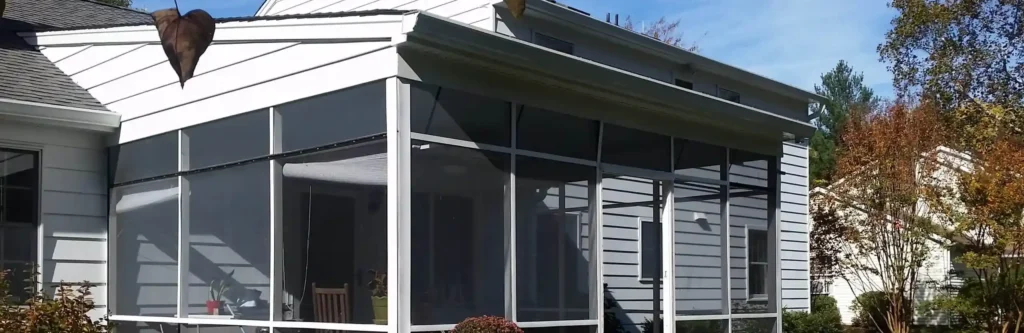
Screening in your porch creates a functional and cozy outdoor space. It protects against insects, filters sunlight, and even adds value to your home. Not only that, but a screened-in porch gives you more usable living space that feels like a mix between indoors and outdoors.
The best part? You can customize it based on your needs—want full privacy, UV protection, or pet-resistant mesh? There’s a screen for that. And whether you’re interested in DIY or looking for professional porch screen services, understanding the basics will help you make the right call.
How to Install Screening on a Porch: Tools and Materials You’ll Need
Before diving into how to install screening on a porch, it’s essential to gather the right tools. Having everything ready beforehand will make the job smoother.
Here’s what you’ll typically need:
- Screen rolls (fiberglass, aluminum, or specialty)
- Screen spline (rubber material to hold screen in place)
- Spline roller
- Utility knife or scissors
- Measuring tape
- Screwdriver or drill
- Staple gun (optional depending on method)
Remember, different porches and frames require slightly different tools, so it’s smart to check your specific needs before starting.
Step-by-Step Installation Process
Learning how to install screening on a porch doesn’t have to be intimidating. Let’s break it down step by step:
1. Measure the Space
Start by measuring the height and width of each section you plan to screen. This helps you buy the correct amount of screen and spline. It’s a good idea to add a few inches to your measurements for overlap and adjustments.
2. Choose the Right Screen Material
There are several types of screen materials available:
- Fiberglass: Flexible and easy to work with.
- Aluminum: More durable but harder to install.
- Pet-resistant mesh: Great if you have pets that might scratch or push against the screen.
- Solar screen: Helps block UV rays and reduce heat.
Choosing the right one depends on your lifestyle. If you’re unsure, porch screen services often offer consultations to help.
3. Prepare the Porch Frame
Next, clean and inspect your porch frame. Remove any old screen, nails, or staples, and make sure the wood or metal is in good condition. If you notice any damage, take time to repair it now. Search for terms like “screen porch repairs near me” if you need help fixing damaged frames.
4. Attach the Screen
Unroll the screen material and lay it over the opening, allowing some overhang. Using a spline roller, press the screen into the groove of the frame, then roll the spline over it to secure it in place. Work from one side to the other, pulling the screen taut as you go.
Cut off the excess screen with a utility knife for a clean finish. Be sure to keep the screen tight to avoid sagging or ripples.
5. Repeat for All Sections
Once you get the hang of it, repeat the process for all your porch openings. This can take some time, but it’s also super satisfying to see your porch transform with each panel.
6. Secure and Inspect
After all sections are installed, double-check for loose edges or wrinkles. If needed, adjust or re-press the spline. Then sit back and admire your handiwork!
When to Hire a Professional for Porch Screen Services
Providing a porch screen services yourself can be fulfilling, but sometimes it’s better to call the pros. If your porch is large or oddly shaped, or if you’re short on time, hiring a local expert might be your best bet.
Look for companies or contractors offering porch screen services in your area. Many of them offer free estimates and can complete the job faster and more efficiently than a typical DIYer. If you want to get a free quote, contact us immediately.
Maintenance Tips After Porch Screen Installation
Once your porch screen is up, a little maintenance will help it last longer. Clean your screens every few months with a soft brush or vacuum attachment. Check for tears, holes, or loose splines regularly and fix them promptly to prevent bigger problems.
Seasonal weather changes can affect your screen, so be mindful after storms or harsh winds. If you need repairs, you can search for “screen porch repairs near me” to find reliable help quickly.
Final Thoughts
Learning how to install screening on a porch can be a rewarding weekend project or a smart upgrade to hire out. No matter which route you take, understanding the process helps you plan better and ensures a smoother experience overall.
If you want bug-free mornings with your coffee or relaxing evenings on the porch without pests, this is a solid upgrade to consider. And now that you know how to install screening on a porch, you’re well-equipped to make it happen. For more details about Porch Screen Services.