
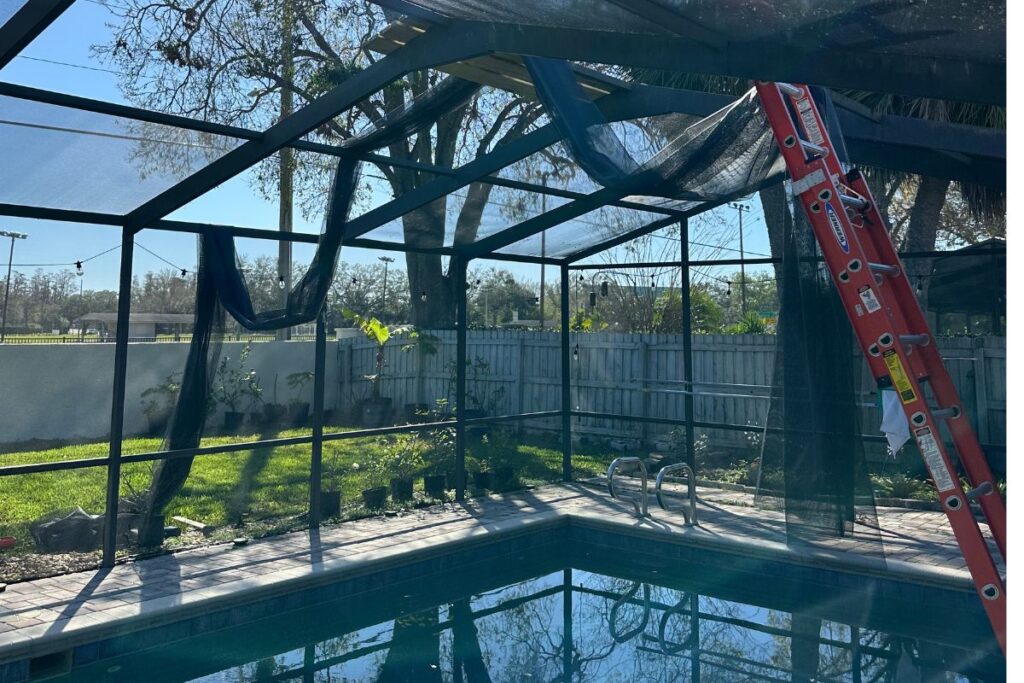
If you’ve booked a pool screen enclosure installation, congratulations — you’re about to gain a bug-free, debris-free, all-season space around your pool. But before the crew shows up with aluminum framing and mesh panels, a little preparation on your end can make the entire project faster, smoother, and free of surprise delays.
Whether you’re working with a local pool enclosure company or comparing quotes from a few pool cage builders, the prep steps below apply to almost every project. Here’s what to do before installation day.
Table of Contents
1. Clear the Pool Deck and Surrounding Area
The single biggest cause of installation delays is a cluttered work area. Before your pool cage installation begins, walk the full perimeter of your pool deck and remove:
- Patio furniture, umbrellas, and cushions
- Potted plants, planters, and decorative rock or mulch beds close to the deck edge
- Pool toys, floats, and storage bins
- Grills, outdoor kitchens on wheels, or portable fire pits
- Any loose decking materials, rugs, or mats
Most pool cage builders need a clear, unobstructed perimeter to set posts, run footers, and maneuver aluminum framing safely. A cluttered deck doesn’t just slow the crew down — it also increases the risk of accidental damage to your belongings.
2. Inspect and Address the Condition of Your Pool Deck
Before any custom pool cage construction services begin, take a close look at the surface your enclosure will be anchored to:
- Cracks or settling — Deck footers for a screen enclosure typically anchor into the existing concrete or paver surface, so significant cracking or uneven settling should be addressed first.
- Drainage — Confirm that water already drains away from the house and pool equipment. Poor drainage issues won’t be fixed by the enclosure and can affect footer stability over time.
- Old fencing or removed structures — If there’s an old pool fence, screen frame, or awning coming down, plan for its removal (or ask your contractor if it’s included) before the new pool screen enclosure goes up.
A reputable pool enclosure contractor will usually do their own site walkthrough, but flagging deck issues early avoids change orders once work has started.
3. Confirm Property Lines, Easements, and HOA Requirements
Florida pool enclosures are subject to local building codes, setback requirements, and — in many communities — HOA design guidelines. Before installation:
- Confirm your property’s setback lines with your contractor or county records
- If you’re in an HOA or deed-restricted community, submit your enclosure design for architectural approval ahead of time
- Locate and mark any easements that could affect where footers can be placed
Most established pool enclosure companies working in Florida are familiar with local permitting, but final responsibility for HOA approval typically falls on the homeowner — so start this step early, since some associations take several weeks to review submissions.
4. Locate Utility Lines and Irrigation Systems
Footers for a pool cage in Florida are often set several feet into the ground, which means underground utilities matter. Before your installation date:
- Call 811 (Florida’s free utility locator service) to have gas, electric, and water lines marked
- Flag any irrigation lines, low-voltage lighting wiring, or invisible pet fencing you know about that a locator service might miss
- Let your installer know if you have a septic system or drain field near the pool area
This single step can prevent costly repairs and project delays for any swimming pool cage Florida project.
5. Decide on Roof Style and Mesh Type Ahead of Time
Prep isn’t just physical — it’s also decision-making. Before installation day, you’ll want to have already finalized:
- Roof style — mansard, dome, gable, hip, or shed, depending on your home’s architecture and budget
- Mesh type — standard fiberglass, pet-resistant, no-see-um, solar, or high-visibility mesh
- Framing color — most pool screen enclosures service providers offer a handful of powder-coated finish options
Making these decisions before the crew arrives — rather than mid-installation — keeps the project on schedule. If you’re unsure which combination fits your home, ask your pool enclosure contractors for recommendations based on your yard’s sun exposure and typical wind conditions.
6. Protect Pets and Plan Around Pool Access
During a pool cage installation, your pool area will be an active job site for anywhere from a day to a couple of weeks, depending on the scope. Plan ahead by:
- Keeping pets indoors or in a fenced area away from the work zone
- Expecting limited or no pool access during active construction days
- Notifying household members (especially kids) that the pool area is off-limits until the crew signals it’s safe
7. Take “Before” Photos
It’s a small step, but photographing your pool area before work begins gives you a clear reference point — useful for your own records and helpful if you ever want a before-and-after comparison once your new screened pool enclosure Florida project is complete.
What Happens After Prep Is Done
Once your pool area is cleared, utilities are marked, and design decisions are finalized, most Florida pool cage installations move quickly — often completed within a few days for standard residential projects. Your installer will walk the site, confirm footer placement, and begin construction according to the design and mesh selections you finalized in the prep stage.
Ready to Get Started?
If you’re comparing florida swimming pool enclosures or getting quotes from local pool enclosure company options, preparation is one of the easiest ways to keep your project on time and on budget. Eclipse Service Hub handles custom pool cage construction services throughout the Tampa Bay area, and our team walks every homeowner through exactly what to expect before, during, and after installation.
Get a free on-site estimate from Eclipse Service Hub, or explore our full pool screen enclosure services to see roof styles, mesh options, and recent projects.