

Table of Contents
Drive through Riverview and you’ll see how different two pool backyards can be. One is a brand-new build with a builder-installed pool and a blank perimeter. Another belongs to a house that’s been here for decades, with a weathered deck and an enclosure that’s seen a lot of summers. A third sits on an open, exposed lot where every afternoon storm arrives with nothing in its way.
A pool cage that suits one of these can be the wrong call for the others. Here’s how to read your own backyard first, so the design decisions — attached or detached, roof shape, mesh — actually fit the property you have. If you’re just starting to explore options, our pool screen enclosure installation in Riverview page covers the roof styles, mesh types, and process we offer locally; this guide goes a step further and helps you match those options to your specific yard.
Step 1: Identify Which Riverview Backyard You Have
Riverview has grown a lot over the past decade, which means homeowners are working with everything from older pool decks to new construction. Most fall into one of three situations:
| Your Backyard | Typical Situation | What to Prioritize |
|---|---|---|
| New build, pool but no cage | Clean slab, builder pool, often in a community with design rules | HOA approval timing, matching the home’s roofline, choosing mesh before install day |
| Established home, older deck | Existing deck with years of wear, sometimes an aging enclosure | Deck condition before anchoring, drainage, whether to rescreen or rebuild |
| Open or exposed lot | Little tree cover or windbreak, more direct weather | Roof shape for wind performance, fastener quality, post-storm inspection plan |
Knowing which column you’re in shapes every choice below.
Step 2: Attached or Detached?
This decision comes down to how your backyard is laid out and how you move between house and pool.
Attached cages tie into the home’s structure, which creates a direct transition from a sliding door or patio to the pool. They make efficient use of space and tend to suit patio-to-pool layouts and more compact lots.
Detached cages stand independently and surround the pool without touching the house. That gives you more design flexibility and works well for larger backyards, custom-shaped pools, and open properties.
If you can picture a natural doorway from the house straight to the water, attached usually makes sense. If the pool sits well out in the yard, detached is often the cleaner fit.
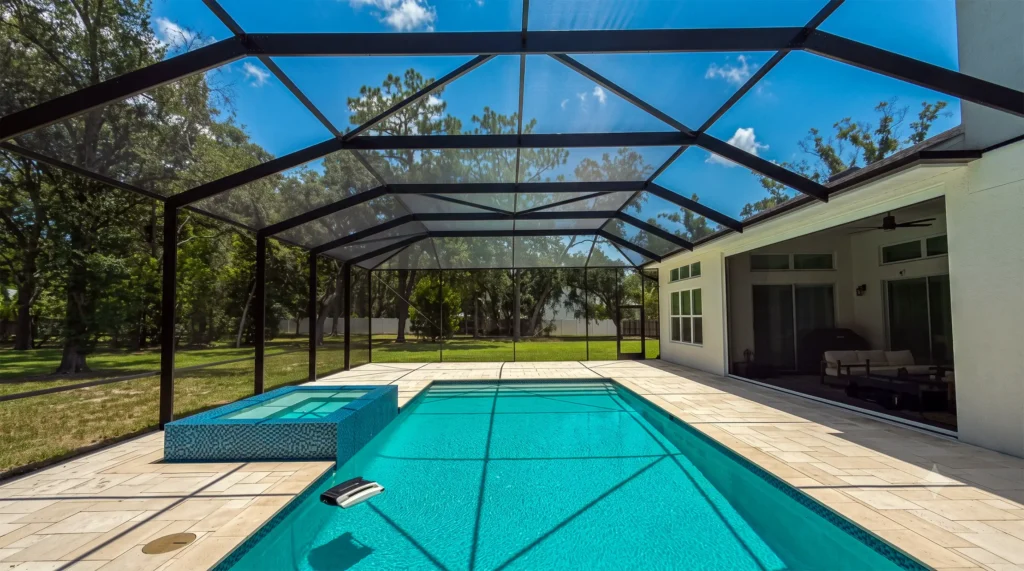
Step 3: Choose the Roof for Your Storm Exposure, Not Just the Look
Roof shape is where appearance and performance meet, and it’s worth thinking about your lot’s exposure.
- Hip roofs slope on all four sides and are among the strongest options for wind resistance, which makes them a sensible pick for exposed, storm-prone lots.
- Gable roofs use a classic pitched design that echoes many home styles, good when you want the cage to match the house.
- Shed roofs are a simple single slope, practical for tighter side-yard lots.
- Mansard and dome roofs offer height, airflow, and a more architectural look, and suit larger enclosures.
We break down the trade-offs between these shapes in our roof style comparison. One thing to keep in mind whichever you choose: the structure should be built with hurricane-rated aluminum and fasteners to Florida code. Even so, a high-category storm can still damage mesh or structure, which is why a post-storm inspection habit matters — our pool cage maintenance guide covers what to check after a storm passes.
Step 4: Pick Mesh Based on How You Actually Use the Pool
Mesh is the piece homeowners tend to pick last and regret first. A few matches worth considering:
- No-see-um mesh for evening swimmers in humid, bug-prone conditions
- Solar screen mesh for hot pool decks and furniture you’d like to protect from fading, since it blocks up to 90% of UV
- Pet-resistant mesh if dogs or cats spend time near the screen
- High visibility mesh if the view matters more than anything else
- Standard fiberglass as the flexible, rust-proof baseline for most homes
If pets or kids will be around, mention it early. One customer on our site noted a kick plate became necessary once their family pointed out the need, and it was easy to add because it came up before the project was finished. Our full pool screen enclosure services page has more detail on each mesh type if you want to compare them side by side before deciding.
Step 5: Check the Deck Before the Cage Goes On
Footers anchor into your existing deck or ground, so the condition of that surface matters. Look for significant cracking, uneven settling, and drainage that pools water toward the house or equipment. Our walkthrough on how to prepare your pool area before installation covers clearing the area, locating utilities, and settling design choices ahead of time.
Step 6: Plan for Permits and HOA Approval Together
A pool cage needs engineering and a permit, and if you’re in a deed-restricted community you’ll likely need HOA architectural approval as well. These run on separate timelines, so starting both early keeps one from holding up the other. Our guide to pool cage permits in Florida explains what each step involves. Eclipse Service Hub handles the engineering and permitting side, and one homeowner on our site described the team doing most of the legwork with their HOA, leaving them to submit only a few requested documents.
Step 7: Know What Installation Actually Looks Like
Once permits are approved, most pool cages take 2–4 days to build. Framing goes up first, then the roof structure, then mesh and doors. For the full sequence, see what to expect during pool enclosure installation.
Questions Worth Asking Any Pool Cage Contractor
Before you commit, ask:
- Who pulls the permit and handles engineering?
- Is the crew in-house, or is the work subcontracted?
- Are the frame and fasteners hurricane-rated and built to Florida code?
- How will they handle my HOA’s approval process?
- What does the final walkthrough include, and what happens with cleanup?
- Who do I call for maintenance or storm damage afterward?
Clear, specific answers to these tell you more than a brochure will.
Serving Riverview and the Communities Around It
Eclipse Service Hub’s main office is in Riverview, and our crews also serve nearby communities including Valrico, Brandon, Seffner, Lutz, Gibsonton, Apollo Beach, and Sun City Center.
Frequently Asked Questions
Do I need a permit for a pool cage in Riverview?
Yes. Pool screen enclosures require engineering and a permit, which we handle as part of the project.
How long does installation take?
Most pool cages take 2–4 days to build once permits are approved.
Which roof style holds up best in a storm?
A hip roof, sloped on all four sides, is among the strongest for wind resistance. Every structure we build uses hurricane-rated aluminum and fasteners to Florida code.
Can I add a pool cage to a home that’s already built?
Yes. Whether your pool was installed with the house or added later, the cage is designed around your existing deck and layout.
Should I rescreen my old pool cage or replace it?
If the frame is sound and only the mesh is worn, rescreening is often enough. Our guide to signs it’s time for rescreening helps you tell the difference.
Get a Pool Cage Designed Around Your Backyard
The best pool cage is the one that fits your lot, your deck, and your storm exposure — not a one-size-fits-all layout. Eclipse Service Hub is based right in Riverview, and our in-house team can walk your property and recommend a design based on what’s actually in your yard, not a generic template.
Book a free on-site estimate or see our full pool screen enclosure installation in Riverview.